Manjaro Linux stands out in the crowded landscape of Linux distributions due to its blend of accessibility, cutting-edge software, and a commitment to user experience. Built on the foundations of Arch Linux, it offers a rolling release model, meaning users can enjoy the latest software updates without the hassle of periodic reinstallation. This guide aims to demystify the installation process, making it accessible to everyone, from Linux novices to seasoned users.
Pre-Installation Requirements
Before diving into the installation process, it is crucial to ensure your system meets the necessary requirements. Manjaro is relatively lightweight, making it suitable for various hardware configurations. Generally, the minimum system specifications include a dual-core processor, 2 GB of RAM, and around 20 GB of free disk space. However, for a smoother experience, especially if you plan to multitask or run demanding applications, it is advisable to have at least 4 GB of RAM and 40 GB of storage.
Once you have verified that your hardware is compatible, the next step is downloading the Manjaro ISO file. The official Manjaro website is the best source for obtaining the latest version. Users can choose from different desktop environments, including Xfce, KDE Plasma, and GNOME. Each environment has its unique aesthetics and functionalities, catering to various user preferences. After selecting your desired edition, it is important to verify the integrity of the ISO file to ensure it has not been corrupted during download. This can typically be done through checksum verification provided on the download page.
Creating Installation Media
Having the Manjaro ISO is just the beginning. To install the operating system, you need to create a bootable installation medium. The most common method is using a USB flash drive, which is convenient and efficient. For this, tools like Rufus for Windows or Etcher for cross-platform usage can be employed. The process involves selecting the downloaded ISO file and the target USB drive, and the software will handle the creation of the bootable media.
Alternatively, if you prefer using a DVD, the ISO can be burned onto a disc. While this method is less common in recent years due to the prevalence of USB drives, it remains a valid option for those without USB capabilities.
Booting from Installation Media
With the bootable USB or DVD ready, the next step is to boot from it. This often requires entering the BIOS or UEFI firmware settings, which can be accessed during the initial boot process by pressing a specific key (often F2, Del, or Esc). Once inside the BIOS/UEFI menu, users can set the boot order to prioritize the USB drive or DVD. After saving these changes and exiting, the system should boot into the Manjaro live environment.
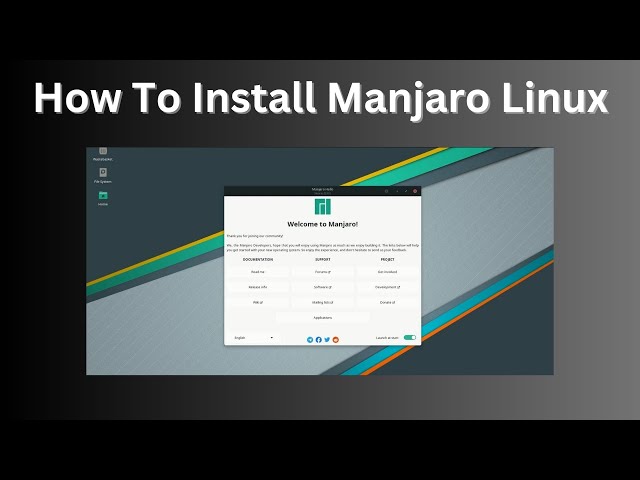
Upon booting, users will be greeted with the Manjaro welcome screen, offering options to either start the live session or launch the installer directly. Choosing the live session allows users to explore the operating system without making any changes to their current setup. This exploration phase is valuable for getting accustomed to the desktop environment and ensuring hardware compatibility before proceeding with the installation.
Installing Manjaro
Once you feel comfortable with the live session, you can begin the installation process. Starting the installer typically involves clicking the “Launch Installer” option from the welcome screen. The installation wizard will guide you through the setup, beginning with language and regional settings. Selecting your preferred language is crucial as it will affect the entire installation process.
Following language selection, you will encounter the partitioning options. Manjaro offers two main approaches: guided and manual partitioning. Guided partitioning is straightforward and recommended for most users, automatically handling the necessary configurations. However, for those who prefer a customized setup, manual partitioning allows for detailed control over disk allocation, enabling users to designate specific partitions for root, home, and swap space.
Once the partitioning is set, the installer will prompt you to create a user account. This involves selecting a username and password, both of which will be required upon logging into the system. After finalizing your account settings, the installation wizard will summarize your choices before proceeding with the installation process. This phase typically takes several minutes, during which the system installs the necessary files and configures the environment.
Post-Installation Steps
Upon completion of the installation, your system will prompt you to restart. After rebooting, you will encounter your newly installed Manjaro operating system. The first boot introduces users to the setup experience, where the system will finalize its configurations and may prompt for further adjustments, such as connecting to Wi-Fi and setting up additional user preferences.
One of the first tasks after installation is to update the system. While the installation process includes the latest packages available at the time, new updates may have been released since then. Using the terminal, you can easily perform a system update by running the command to ensure all software is up to date and secure.
Exploring the software ecosystem of Manjaro is another exciting aspect post-installation. The Manjaro Software Center provides a user-friendly interface for discovering and installing additional applications. Furthermore, users can access the Arch User Repository (AUR) for a vast collection of community-maintained software, expanding the range of applications available.
Troubleshooting Common Issues
As with any installation, challenges may arise. Common installation errors can often be resolved through simple troubleshooting steps. For instance, if the installer fails to detect your disk drives, checking BIOS settings for the correct configuration may solve the issue. Additionally, boot problems can often be addressed by reviewing boot options in the GRUB menu during startup.
Conclusion
Installing Manjaro Linux opens the door to a powerful and customizable operating system, catering to a wide range of user needs. This guide has walked you through the process from preparation to installation and beyond. By taking the time to understand each step and exploring the features of Manjaro, users can harness the full potential of this robust distribution.
As you embark on your journey with Manjaro, the community awaits to support you. Whether seeking help on forums or sharing your experiences, the collective knowledge and enthusiasm surrounding Manjaro will enrich your Linux experience.